Sunday, November 25, 2007
Saturday, November 24, 2007
Wednesday, November 21, 2007
Monday, November 19, 2007
Sunday, November 18, 2007
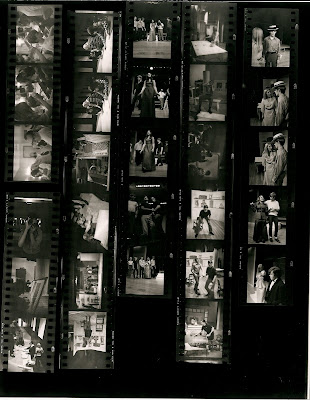
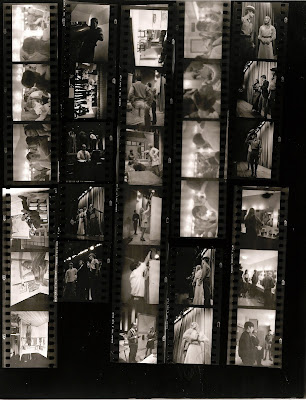
Contact. I went through my negatives files yesterday and came up with around 180 negatives that I kept from High School spanning from 1968-1971. I made contact sheets yesterday and I'll send these to the school to look over and see if they want any of them for their history project. These two sheets were taken of a production of 'Hello Dolly' from 1970. As much as I enjoyed participating in High School Drama of the stage sort I cringe when I think of my "performances"
Friday, November 16, 2007
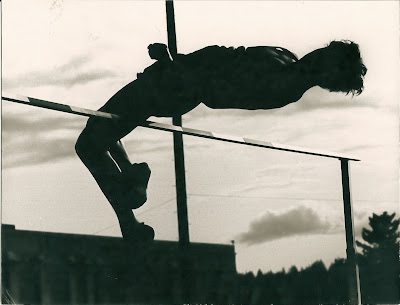
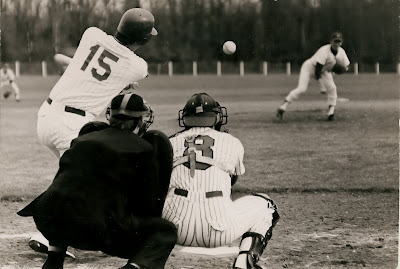
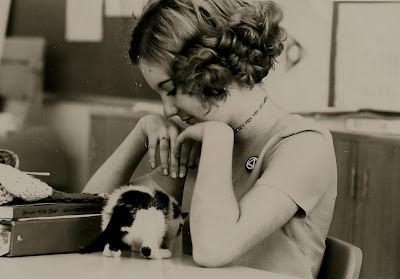
Old School. The High School I went to forty years ago is preparing a history of the school and found my web site where I posted a few pictures taken back when I was a student photographer there. This weekend I plan to make some contact sheets to send to them. Unfortunately I can't find the negatives for these pictures so I only have prints I can scan. The three photographs here were submitted to a district wide school photo contest in 1971.
Tuesday, November 13, 2007
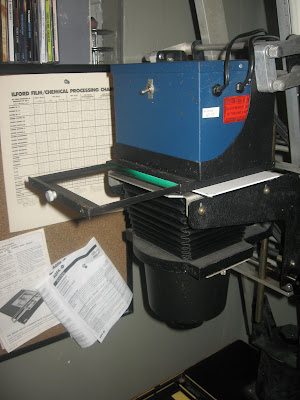
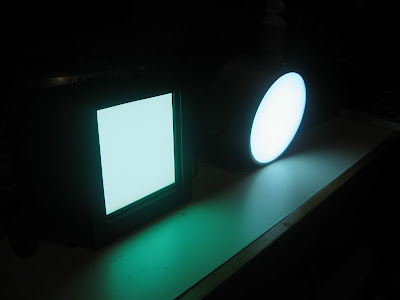
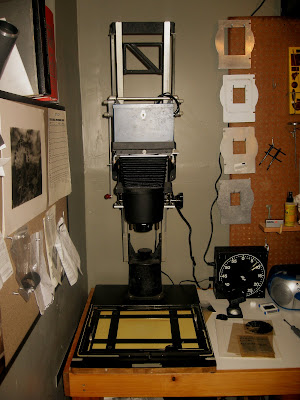
"New" cold light head for my enlarger. Two years ago I became interested in trying out cold light enlarger heads as an alternative to the condenser light source I had always used. The standard condenser head with its hot incandescent light projected through two condensers focuses the light in straight lines giving a very sharp and contrasty print. The condenser heads brought out all of the detail in the negative along with all the flaws such as scratches, dust, chips in the emulsion. etc. The cold lights used florescent bulbs that were cooler and the light was projected through a diffusion filter that scattered the light . The cool light kept the negatives from warping and the diffusion 'softened' the image as well as the imperfections in the negative,reduced contrast and stretched the mid tonal range. Ansel Adams was a proponent of the cold light over the condenser head. One of the problems with the older fluorescent was that unlike an incandescent light which flicks on close to maximum output the florescent take awhile to warm up. Printing requires an exposure of 60 seconds or less and the fluorescent could vary in the intensity depending on how long the light had been on. One solution was to keep the light on constantly while printing and use a lens cap to shut off the light when the proper exposure had been made. Omega made a diffusion enlarger head called the 'Omegalite' with a circular doughnut shaped florescent light back in the 1940's. My first cold light I used was one of this type. It was dimmer then a condenser light source, and focusing was more difficult but with a good negative it did provide an alternative to the sharp condenser light source softening the image just a bit to eliminate some imperfections in the negative. The florescent also lasted much longer and I didn't have to swap condensers every time I worked with a different film size just change the enlarger lens. I upgraded to an Aristo grid light a year ago that was a special florescent designed for cold light heads and was brighter and the design provided more even illumination. The light units also had a heater which kept the bulb warm which I believe kept the light output even when it was turned on. The problem though was that the cold lights were made to use with graded papers rather then variable contrast paper. Graded papers are difficult to find and there are some advantages to variable contrast papers that allow for stretching the tonal range further with split filtering techniques. You can use variable contrast paper without filters and will pretty much get a grade 3. The older cold lights used a white light that was more towards the blue end of the spectrum, and the filters were designed for use with incandescent lights that were more towards the red. It was suggested that you use a special yellow gel filter with the older cold lights to bring the light closer to a range that worked with variable contrast filters and the paper they were designed for. I recently found an older Aristo head built to use with a D-2 that had a filter drawer but it needed a bulb. I did some research and cold lights were being made that worked better with filters. The lights are called a V-54.http://www.aristogrid.com/v54art.htm I received a lot of help from the Aristo Light company in finding the right bulb that would work with my particular head . I just got the bulb today and set it up and did some printing this evening. I used the same negative I printed this weekend using variable contrast paper without a filter. I made prints with a 1, 1 1/2, and 2 numbered filters and after the prints dry down I can compare them to the prints I made this weekend to see if there is much improvement. I'll still use my condenser system but now if I want to experiment with a cold light I won't have to sacrifice the variability of multiple contrast filters.
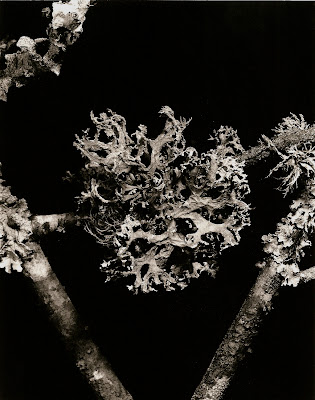
Lichens. I printed yesterday some of the 4x5 negatives I shot on Sunday. Working with the cold light rather then the condenser light source. The negatives looked pretty clean from what I ususally get so I'll try next weekend to working with condenser for maximum clarity. I haven't used the view camera in months but everything went very smoothly. Exposures were correct, the negatives looked pretty good. I need to work with the camera more to get comfortable with it. The Agfa 400 film though that was 17 years old did yield an image but the negatives looked a tad dark like there was some fog. Shows you though how film if stored properly can be useful long after it's expiration date. This picture was done using Ilford Delta 100 ASA, developed in Rodinal 1:25 and printed out on a cold tone ilford matte paper.
Sunday, November 11, 2007
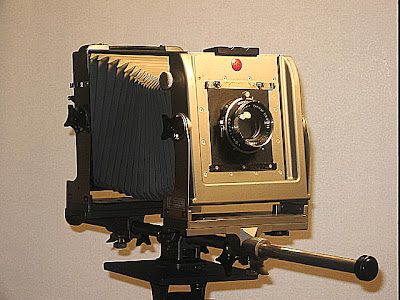
I've been shooting color and black and white film of macro subjects yesterday and today but I didn't use my entire roll of Agfa 25 35mm. I use this film carefully because it's hard to find. I wanted a negative to work with tomorrow so I dragged out the view camera and I wanted to test some Agfa film I bought on e-bay that expired in 1990 to see if it was any good. Thought I'd post some photos of the process so you could see what is involved in working with a view camera.
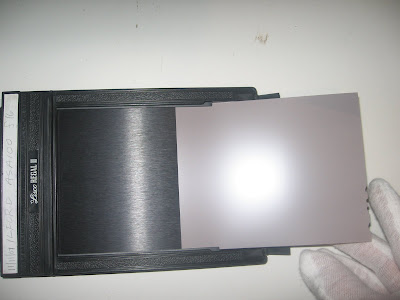
Loading the film carefully and correctly in to the film carrier takes practice and patience. The film is notched on one corner in the dark you will want to find this notch and use it to orient the film proprely in to the carrier to make sure the emulsion side of the film is up. Using cotton or latex gloves will allow you to handle the film without getting fingerprints on it. The tough part is avoiding scratching the film and keeping dust particles out. Oh well that's why they invented retouching.
Saturday, November 10, 2007


105mm f 4 Micro-Nikkor with PN-11 extension tube. The PN-11 extension allows for a 1:1 magnification ratio (image size equal to actual size). It has a tripod mount allowing for better balance and lets you shift from a vertical to horizontal format easily. The greater focal length allows for good closeups without having to get too close to the subject. I used this lens with real good results in photographing butterflys in the Winged Wonders exhibit at the zoo. 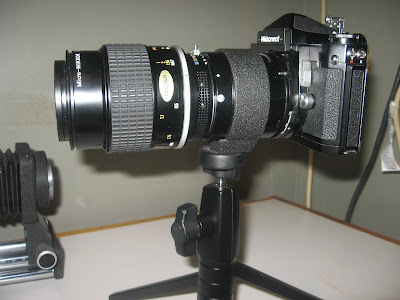

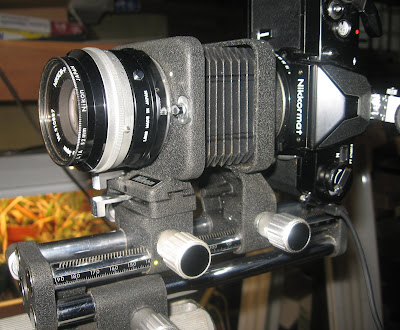
I found an adapter on e-bay that lets me use 39mm screw mount enlarger lenses on my bellows. Here I have my 105mm Nikkor bellows lens and a 135mm El Nikkor enlarging lens. I also can use my 50mm and 75 mm El Nikkor lenses.
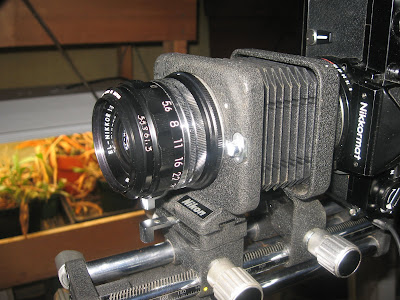 Why would I want to have lenses of different focal lengths for my bellows? I don't really know but I think it's kind of cool.
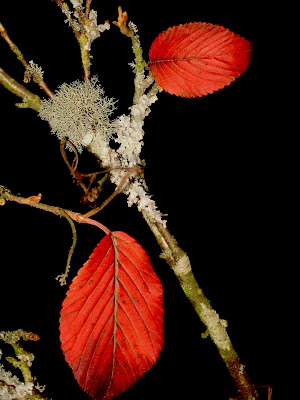
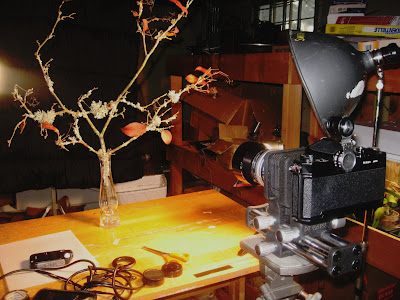
I worked for several hours doing some color macro work this morning. I found this branch outside covered with lots of interesting lichens and a few scarlet leaves. Above is the subject. I want to work tomorrow with black and white film and color on some extreme closeups of the lichens. I used several strobes for lighting and my 105 nikkor bellows lens with the nikon PB-4 bellows. The PB-4 is the cadillac of Nikon Bellows. The bellows are seated on a sliding platform that moves camera, lens, and bellows forwards and backwards to allow for minor adjustments in magnification or composition without having to move your tripod forward or backwards. The camera can be adjusted easily from a horizontal to vertical format, and the front panel where the lens is anchored has left to right movement as well as swing like a view camera.
Friday, November 09, 2007

After sharing a house with roomates for a year and a half I was given a chance to house sit and take care of this cat while their owner was a way. The house was a small guest house on an estate in Wilsonville. There was a greenhouse on the property and gardeners. I felt like quite the country gentleman and it was a nice vacation.
In the late 70's I shared a house with several art students from the museum school. Two of them were wonderful calligraphers and I photographed this and several other pieces for their portfolio. One of my sons is taking Russian for his language requirement at Franklin High School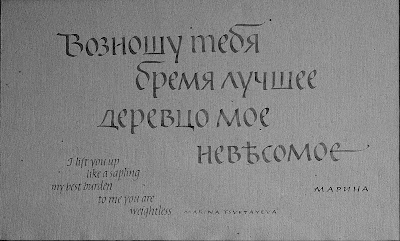 and was able to read this to me. I tried taking up calligraphy myself but at the time I lacked the discipline necessary (it did improve my handwriting though). I think it is the ideal craft; functional, beautiful, and the elements required a pen, ink and paper are accessible to anyone. The most difficult element is ones personal dedication to craft which can take a lifetime to acquire. It's not an art form for those who want instant results.
 and was able to read this to me. I tried taking up calligraphy myself but at the time I lacked the discipline necessary (it did improve my handwriting though). I think it is the ideal craft; functional, beautiful, and the elements required a pen, ink and paper are accessible to anyone. The most difficult element is ones personal dedication to craft which can take a lifetime to acquire. It's not an art form for those who want instant results.
Thursday, November 08, 2007
Wednesday, November 07, 2007

I had some old slides scanned and converted to JPG files so I could post them here. Most were taken in the early 1970's when I first bought my Nikon F and later in 1978-79 when I bought my Leitz CL. Here is a picture taken at PSU back in 1972 when the mall was being constructed. Construction began in 1971 when I first attended. That winter 71/72 we had to cross campus on boards over the mud.


